The Secondary Panel Column
So far, we've been focusing our attention on the main panel column. But there's also a secondary column to its left. This second column can seem a little confusing at first because by default, the panels in this column appear only as icons: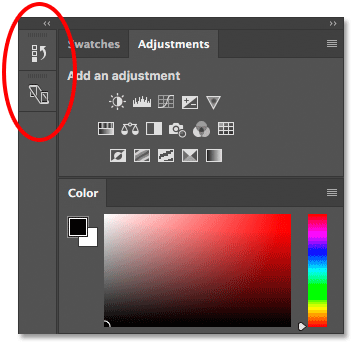
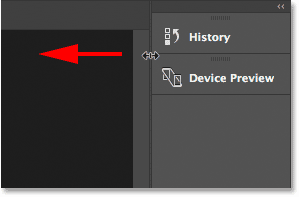
A second panel column appears to the left of the main column.
In Photoshop CC, the two panels that initially appear in this second column are the History panel on top and the Device Preview panel below it. This may leave you asking, "How the heck are we supposed to know which panels they are just by looking at these weird icons?" Well, one way is that if you happen to have Show Tool Tips enabled in Photoshop's Preferences (it's on by default), the names of the panels will appear when you hover your mouse cursor over each icon.A better way, though, is that if you hover your mouse cursor over the left edge of the column, your cursor will turn into a double-headed direction arrow. Click on the column's edge and, with your mouse button held down, drag it out towards the left to resize the column. As you drag, you'll see the actual names of the panels appearing beside the icons, which is much more helpful. Release your mouse button once you've added enough space for the names to fit:
Resizing the width of the second column to display the panel names along with the icons.
Expanding And Collapsing Secondary Panels
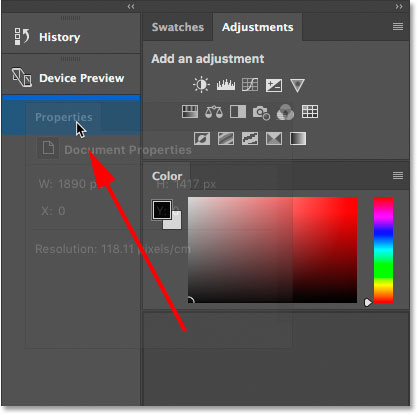
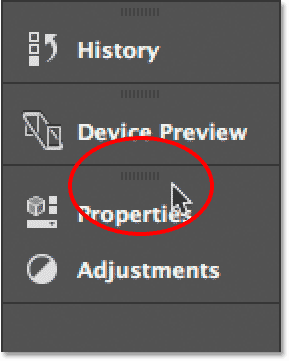
A good use for this secondary column is to hold panels we use but don't need to have open all the time. The icon view mode keeps these panels available without them taking up valuable screen space. To expand a panel to full size, click either on its icon or its name. Here, I'm expanding the History panel by clicking on it: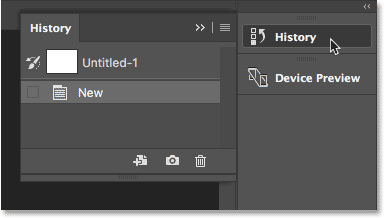
Clicking on the History panel's name / icon to expand it to full size.
To collapse the panel back to its icon view mode, either click again on its icon or name, or click the small double arrow icon in the upper right of the panel: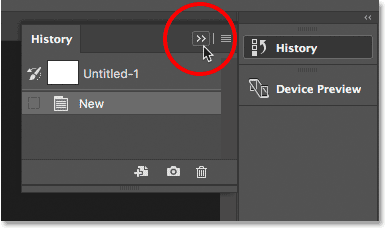
Clicking the double arrow icon to collapse the panel.
Collapsing And Expanding The Secondary Panel Column
To expand all the panels in the second column at once, click the double arrow icon in the top right corner of the second panel: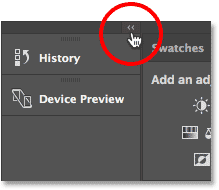
Clicking the double arrow icon to expand the entire second panel.
To collapse all the panels in the second column at once, click again on the same icon: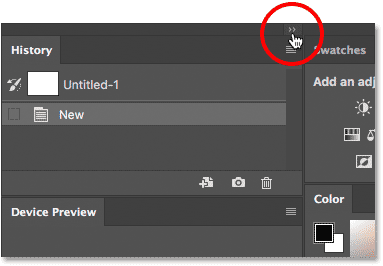
Clicking the same double arrow icon to collapse the second panel.
Collapsing And Expanding The Main Panel Column
To free up even more space on the screen, you can also collapse the main panel column. To collapse the main column, click the double-arrow icon in the upper right: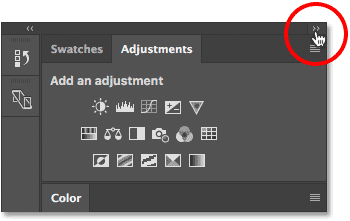
Collapsing the main panel column.
This will initially collapse the panels so that only their name and icon are visible:The main column after initially collapsing the panels.
To collapse the main panels into just their icons, hover your mouse cursor on the dividing line between the main and second columns. When your cursor changes into a double-headed direction arrow, click on the dividing line and drag it towards the right until only the icons are visible:Both columns of panels now appear in icon view mode.
To instantly expand the main column back to full size, click again on the double arrow icon in the top right corner: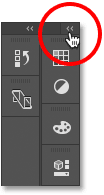
Clicking the double arrow to expand the main column to full size.
And now we're back to the column's default view mode, which is how I usually leave it: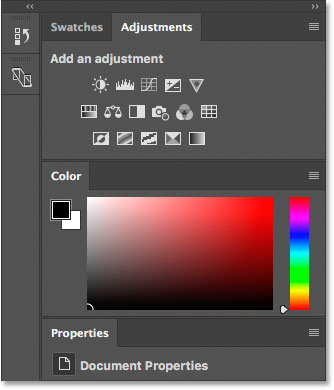
The main column is now back to full size.
Moving Panel Groups Between Columns
We can move panels in Photoshop from one column to another just as easily as we can move them between groups. To move a panel between columns, click and hold on the panel's tab and drag the panel into the other column. The blue highlight box or bar tells you where the panel will be dropped when you release your mouse button.Let's say I want to move my Properties panel from the main column into the secondary column. And, I want it to appear in its own, independent group in the second column. To do that, I'll click and hold on the Properties tab. Then I'll drag it over to the second column so that the blue bar appears directly below the Device Preview panel:
Dragging the Properties panel from the main column to the secondary column.
I'll release my mouse button, and now my Properties panel appears in its own group below Device Preview:
The Properties panel is now in the secondary column.
Next, I want to move my Adjustments panel into the same group as my Properties panel. I'll click and hold on the Adjustments tab in the main column. Then I'll drag it into the second column and over top of the Properties panel's tab so that the blue highlight box appears around the tab itself: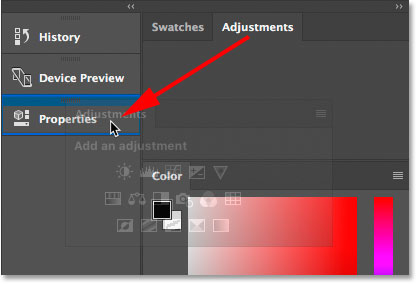
Grouping the Adjustments panel in with the Properties panel in the second column.
I'll release my mouse button, and now both panels share the same group in the second column: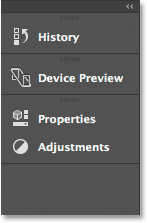
Both panels have been moved from one column to the other.
Moving Panel Groups Between Columns
We can also move an entire panel group between columns. To select a panel group in the main column, click and hold on an empty spot beside the tabs along the top. In the secondary column, click and hold on the bar at the top of the group. Then, drag the group from one column to the other.Let's say I want to move my Properties and Adjustments group back into the main column. To grab the entire group at once, I'll click and hold on the small bar at the top of the group:
Clicking the bar to select the panel group.
Then, I'll drag the group into the main column so that the blue bar appears between the Swatches and Color panels: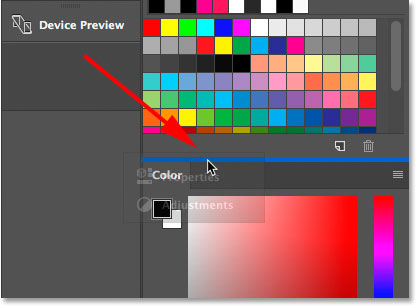
Clicking the bar to select the panel group.
When I release my mouse button, Photoshop drops the group between those two panels. And now, both panels are back in the main column: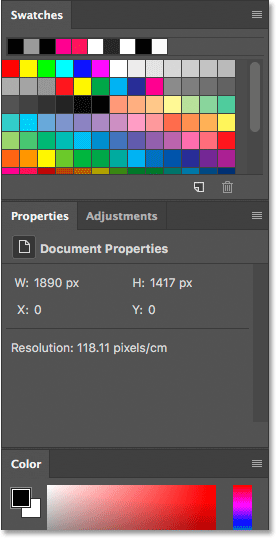
The entire panel group has been moved at once.
How To Reset The Panels Back To Default Layout
Now that we know how to move panels around inside Photoshop, let's reset them back to the default layout. To reset Photoshop's panels, click the workspace selection icon just above the panel area: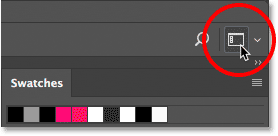
Clicking the workspace selection icon.
Then choose Reset Essentials from the menu. This resets the Essentials workspace and sends your panels back to the default layout: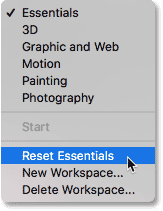
Choosing "Reset Essentials".
Opening Images Into Photoshop
Before we look at tabbed and floating documents, let's first open some images into Photoshop. Here I've used Adobe Bridge to navigate to a folder containing three photos. I want to open all three of them at once into Photoshop. To do that, I'll click on the image on the left to select it. Then, I'll press and hold my Shift key and I'll click on the image on the right. This selects all three images at once, including the one in the middle. Then, to open all three into Photoshop, I'll double-click on any one of the thumbnails:
Selecting three images in Adobe Bridge.
Tabbed Documents
By default, Photoshop opens our images as tabbed documents. We'll look at what that means in a moment. But at first glance, something doesn't seem right. I've opened three photos, but where are they? Only one of the three is displayed on the screen (swallowtail butterfly photo from Adobe Stock):
After opening three images in Photoshop, only one is visible.
The Tabs
It may not look like it, but the other two images are open as well. We just can't see them at the moment. That's because Photoshop opened the images as a series of tabbed documents. If we look along the top of the photo, we see a row of tabs. Each tab represents one of the open images. The name of each photo appears in its tab. The tab that's highlighted is the one that's currently active, meaning it's the one we're seeing on the screen. The other tabs are hiding behind it and not currently visible:
The row of tabs along the top. Each image gets its own tab. The highlighted tab is currently active.
Switching Between Tabbed Documents
To switch between tabbed documents, simply click on the tabs. At the moment, my third image (the tab on the right) is active. I'll click on the tab in the middle to select it:
Choosing a different photo by clicking on its tab.
And now we see a different image on the screen. By default, we can only view one image at a time. So the image that was visible a moment ago is now hiding in the background (butterfly on flower photo from Adobe Stock):
The second of three open images is now visible after clicking on its tab.
I'll click on the tab on the left to select it and make it active:
Clicking on the first tab in the row.
And now we see the other image I've opened (blue butterfly photo from Adobe Stock):
The third of the three photos is now visible after selecting its tab.
Switching Between Tabbed Documents From The Keyboard
Along with clicking the tabs, we can also switch between tabbed documents from the keyboard. On a Windows PC, press Ctrl+Tab to move left to right from one tab to another. On a Mac, press Control+Tab. To move between tabs in the opposite direction (from right to left), press Shift+Ctrl+Tab (Win) / Shift+Control+Tab (Mac).Changing The Order Of The Tabs
To change the order of tabbed documents, click and hold on a tab and drag it to the left or right of other tabs. Release your mouse button to drop the tab into place. Make sure, though, that you drag straight across horizontally. If you drag diagonally, you may accidentally create a floating document window. We'll look at floating windows next:
Click and drag tabs left or right to change the order of the documents.
Floating Document Windows
The other way to view your open images in Photoshop is by displaying them as floating document windows. Let's say you have multiple images open as tabs, as I do here. To turn one of the tabs into a floating window, click on the tab and, with your mouse button held down, drag the tab down and away from the other tabs:
Clicking and dragging one of the tabs away from the others.
When you release your mouse button, the image appears in a floating window in front of the other tabbed documents. You can move floating windows around on the screen by clicking in the gray tab area along the top of the window and, with your mouse button held down, dragging it around with your mouse:
The image now appears as a floating document.
Displaying All Open Images As Floating Windows
If you want to switch all of your tabbed documents into floating windows, go up to the Window menu in the Menu Bar along the top of the screen, choose Arrange, and then choose Float All in Windows:
Going to Window > Arrange > Float All in Windows.
And now all three of my images appear in floating windows, with the currently active window displayed in front of the others. Again, we can move the windows around on the screen to reposition them by clicking and dragging the tab area along the top of each window. To make a different window active and bring it to the front, just click on it:
All three images now appear in floating windows.
Viewing A List Of Open Documents
One of the main advantages to viewing our images as floating documents is that we can see more than one image at a time. But that can also cause problems. Too many floating windows open at once can clutter up the screen. Also, some of the windows can completely block others from view. Fortunately, there's an easy way to select any image that's open in Photoshop, even if you can't see it.Go up to the Window menu at the top of the screen. Then, look down at the very bottom of the menu. You'll see a handy list of every image that's open. The currently-active image has a checkmark beside it. Click on any image in the list to select it, which will make it active and bring it to the foreground:

Photoshop provides a list of all open documents at the bottom of the Window menu.
Switching Back To Tabbed Documents
To switch from floating windows back to tabbed documents, go up to the Window menu, choose Arrange, and then choose Consolidate All to Tabs:
Going to Window > Arrange > Consolidate All to Tabs.
And now my images once again appear as tabbed documents, with only one image visible at a time:All floating windows have reverted back to tabbed documents.
Setting Photoshop's Preferences
Once you decide which viewing style you like best (tabbed documents or floating windows), you can tell Photoshop to open all future images in that style using an option found in the Preferences. If you're using Photoshop CC, then on a Windows PC, go up to the Edit menu at the top of the screen, choose Preferences, and then choose Workspace. On a Mac, go up to the Photoshop CC menu, choose Preferences, then choose Workspace:
In Photoshop, the document options are found in the Workspace preferences.
If you're using Photoshop CS6, then on a Windows PC, go up to the Edit menu, choose Preferences, and then choose Interface. On a Mac, go up to the Photoshop menu, choose Preferences, then choose Interface:
In Photoshop CS6, the document options are in the Interface preferences.
Open Documents As Tabs
This opens the Photoshop Preferences dialog box set to either the Workspace (Photoshop CC) or Interface (Photoshop CS6) category. Look for the option that says Open Documents as Tabs. By default, this open is checked, which means that all of your images will open as tabbed documents. If you'd prefer to have them open as floating windows, uncheck this option:
The Open Documents as Tabs option.
Enable Floating Document Window Docking
There's a second option directly below it that's also important. Enable Floating Document Window Docking (say it five times fast) controls whether or not we can drag one floating window into another and nest them together, creating tabbed documents inside a floating window:
The Enable Floating Document Window Docking option.
To show you what I mean, here I have two of my images open side by side as floating windows. I'll click on the tab area along the top of the window on the left and begin dragging it into the window on the right. As I drag up towards the top of the window on the right, we see a blue highlight box appearing around its edges. This highlight box tells me that if I release my mouse button at this point, Photoshop will dock both of the images together inside the same floating window:
Dragging an image from one floating window into another.
I'll release my mouse button, and now both of my images are grouped together as tabbed documents inside a single floating window. This can be a handy feature for keeping related images organized on the screen. Just as with normal tabbed documents, I can easily switch between them by clicking on their tabs. To separate the images again and place them back into their own floating windows, all you need to do is click and drag one of the tabs away from and outside of the window, then release your mouse button:
The two images are now docked together as tabs inside a floating window.
The Enable Floating Document Window Docking option is enabled (checked) by default. If you decide you don't like this feature, you can easily turn it off by unchecking the option in Photoshop's Preferences.Closing A Single Tabbed Document Or Floating Window
Finally, to close a single image that's open as a tabbed document, click on the small "x" icon on the edge of its tab. On a Windows PC, the "x" is on the right of the tab. On a Mac (which is what I'm using here), it's on the left:
Closing a single tabbed document.
To close an image open in a floating window, on a Windows PC, click the "x" icon in the top right corner of the window. On a Mac, click the red "x" icon in the top left corner:
Closing a single floating window.
Closing All Open Documents
To close all open images regardless of whether you're viewing them as tabs or floating windows, go up to the File menu at the top of the screen and choose Close All:
Going to File > Close All.
Opening Images Into Photoshop
I'll start by opening a couple of images into Photoshop. Since this tutorial continues from the previous tutorial, I'll use the same images again. Here, I've used Adobe Bridge to navigate to a folder containing my three images. Rather than opening all three at once into Photoshop, I'll start by opening just two of them. To select the images, I'll click on the thumbnail for the first image on the left. Then, to select the middle image as well, I'll press and hold my Shift key and I'll click on the middle thumbnail. With the first two images now selected, I'll open them into Photoshop by double-clicking on either of the thumbnails:
In Adobe Bridge, selecting and opening the first two images into Photoshop.
Tabbed Documents
Both images open in Photoshop as tabbed documents. But we can only see one document at a time. The other document is hidden behind the visible one (butterfly on flower photo from Adobe Stock):
The images open as tabbed documents. Only one of the documents is visible.
Switching Between Tabbed Documents
We can switch between tabbed documents by clicking the tabs along the top of the images. At the moment, my second image ("orange_butterfly.jpg") is selected. I'll switch to the first image ("blue_butterfly.jpg") by clicking its tab:
Clicking the tabs to switch between open images.
This hides the original image and shows me the other image I've opened (blue butterfly photo from Adobe Stock):
The original image is now hidden behind the new image.
Photoshop's Multi-Document Layouts
To view both open images at once, we can use Photoshop's multi-document layouts. To find them, go up to the Window menu in the Menu Bar along the top of the screen. Then, choose Arrange. The various layouts are grouped together at the top of the menu. Depending on how many images you've opened, some of the layouts may be grayed out and unavailable. In my case, since I've opened only two images, the layouts for viewing three or more documents are grayed out:
The multi-document layout options in Photoshop.
I'll select the 2-up Vertical layout:
Selecting the "2-up Vertical" layout.
This displays both of my open documents side-by-side, allowing me to view both images at once:
The "2-up Vertical" layout.
The Active Document
Multi-document layouts make it easy to view more than one image at once. But it's important to remember that Photoshop only lets us edit one image at a time. The image we're editing appears in the active document window. We can tell which document window is active because its tab appears highlighted. Here we can see that my "blue_butterfly.jpg" document is the currently-active document because its tab is highlighted. To make a different document window active, click either on its tab or anywhere inside the document window:
Photoshop highlights the tab of the active document window.
Grouping Document Windows
So far, we've seen that we can easily view two images at once in Photoshop using the "2-up Vertical" layout. Let's see what happens if I open a third image while still using the same two-document layout. I'll switch back over to Adobe Bridge. Then, I'll open my third image ("yellow_butterfly.jpg") into Photoshop by double-clicking on its thumbnail (swallowtail butterfly photo from Adobe Stock):
Selecting and opening a third image from Bridge into Photoshop.
This opens my third image into Photoshop. But since I've opened a third image into a layout designed for viewing only two images, Photoshop did not open my third image in its own, separate document window. Instead, it maintained the two-document layout by grouping, or docking, my third image in with the document that was previously active. I still have two main document windows. But the window on the left (which was the active window when I opened the third image) now holds two tabbed documents. The window on the right holds only one:
Photoshop grouped the third image into the document window on the left.
Switching Between Grouped Documents
Just like with normal tabbed documents, Photoshop only displays one image inside a group at a time. Click the tabs to switch between images in the group. At the moment, my "yellow_butterfly.jpg" document is visible on the left. I'll switch back to viewing my "blue_butterfly.jpg" image by clicking its tab:
Switching between grouped documents by clicking the tabs.
And now the "blue_butterfly.jpg" image is once again visible in the left window:
The visible image in the left document window has changed.
Changing The Order Of Tabbed Documents In A Group
Also like normal tabbed documents, we can change the order of the tabs within a group. Click on the tab of the document you want to move. Then, with your mouse button still held down, drag the tab to the left or right of the other tab(s) within the same group. Release your mouse button to drop the tab into place:
Click and drag the tabs in a document group to change their order.
Moving Tabbed Documents Between Windows
What if I wanted my blue butterfly to be grouped in with the orange butterfly in the window on the right? To move a tabbed document from one window to another, click and hold on the tab of the document you want to move in the first window. Then drag the tab left or right into the tab area along the top of the other document window. When a blue highlight box appears around the window, release your mouse button to drop the document into the new window:
Dragging a tab from the window on the left into the tab area of the window on the right.
After dragging and dropping the tab, my blue butterfly document is now grouped in with the orange butterfly in the window on the right. The yellow butterfly now sits alone in the window on the left:
The left window now holds a single image. The right window holds two images as tabbed documents.
Changing The Layout
To view all three images at once in Photoshop, all I need to do is switch from the "2-up Vertical" layout to a three-document layout. To switch layouts, I'll go back up to the Window menu and choose Arrange. This time, I'll choose 3-up Vertical:
Going to Window > Arrange > 3-up Vertical.
And now all three images appear in their own separate document windows, allowing me to see all three at once:
The "3-up Vertical" layout.
Zooming And Panning Images In Multi-Document Layouts
Let's learn how to zoom and pan images within a multi-document layout. We'll start with panning.Panning An Image
To pan, or scroll, a single image within a multi-document layout, first click anywhere inside the image to make its document window active. Then, press and hold the spacebar on your keyboard. This temporarily switches you to Photoshop's Hand Tool. You'll see your mouse cursor change into a hand icon. With the spacebar held down, click on the image and drag it into position.In my case, the butterfly in the photo on the left of my layout is sitting off to the side and out of view. To reposition the butterfly, I'll click on the image to make its document window active. I'll press and hold my spacebar, and then I'll click on the image and drag the butterfly into the center of the document window:

Panning the image on the left to center the butterfly in the document window.
Panning All Images At Once
To pan all open images at once, press and hold your Shift key and the spacebar. Click and drag any image within the layout to reposition it. The other images will move along with it.Zooming In And Out Of An Image
To zoom in on a single image in a multi-document layout, first click on the image to make its document window active. Then, press and hold Ctrl+spacebar (Win) / Command+spacebar (Mac). This will temporarily switch you to Photoshop's Zoom Tool. Your cursor will change into a magnifying glass with a plus sign (+) in the center. Click on the image to zoom in on that spot. Click repeatedly to zoom in further.Here, I've zoomed in on the blue butterfly in the middle document:

Zooming in on a single image within the layout.
To zoom out, press and hold Ctrl+Alt+spacebar (Win) / Command+Option+spacebar (Mac). You'll see the same magnifying glass cursor icon but with a minus sign (-) in the center. Click on the image to zoom out from that spot. Click repeatedly to zoom out further.Zooming In Or Out Of All Images At Once
To zoom in on every open image at once, press Shift+Ctrl+spacebar (Win) / Shift+Command+spacebar (Mac) and click on any image within the layout. All images will zoom in at the same time. To zoom out of every image at once, press Shift+Ctrl+Alt+spacebar (Win) / Shift+Command+Option+spacebar (Mac) and click on any image.Matching The Zoom Level And Position Of All Images
Photoshop lets us quickly jump all images within a multi-document layout to the exact same zoom level or position. First, click on the image with the zoom level or position you want the other images to match. Go up to the Window menu, choose Arrange, and then choose the Match option you need. To match all images to the zoom level of the selected image, choose Match Zoom. To match their position, choose Match Position. There's also a Match Rotation option to match the rotation angle of all open images. We'll look at rotating images in another tutorial. To match the zoom level and position (as well as the rotation angle) of all images to the selected image, choose Match All:
The Match Zoom, Location, Rotation and All options.
Switching Back To The Default Tabbed Layout
Finally, to revert your layout back to the default, with only one image visible at a time, go up to the Window menu, choose Arrange, and then choose Consolidate All to Tabs:
Going to Window > Arrange > Consolidate All to Tabs.
And now my images are back to the standard, tabbed document layout:
Back to Photoshop's default document layout.
Comments
Post a Comment