Navigation Tools

- Hand Tool * ( H )
- The Hand Tool lets us click and drag an image around on the screen to view different areas when zoomed in.

- Rotate View Tool ( R )
- Use the Rotate View Tool in Photoshop to rotate the canvas so you can view and edit the image from different angles.

- Zoom Tool * ( Z )
- Click on the image with the Zoom Tool to zoom in on a specific area. Press and hold Alt (Win) / Option (Mac) and click with the Zoom Tool to zoom out.
How To Reset The Photoshop Toolbar And Tool Settings
Step 1: Select A Default Tool
Luckily, we now have a way to instantly reset Photoshop's Toolbar back to its default layout thanks to the improved Reset All Tools command. But before we reset the Toolbar, there's one important step we need to do. In order for this to work, we first need to select a spot in the Toolbar where the default tool is still visible. In my case (and most likely yours, too), the spot at the very top of the Toolbar is still showing the Move Tool. The Move Tool is the default tool for its group. Click on the Move Tool to select it. You can also select the Move Tool by pressing the letter V on your keyboard. Note that the Move Tool itself is not what's important here. You can select any tool as long as it's the default tool for its group: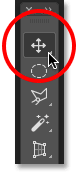
Selecting the Move Tool at the top of the Toolbar.
Step 2: Choose "Reset All Tools" In The Options Bar
With a default tool selected in the Toolbar, if you look up in the Options Bar along the top of the screen, you'll find the Tool Presets option over on the far left. The Tool Presets option doesn't have an icon of its own. Instead, it displays the icon of whichever tool is currently selected. In my case, it's the Move Tool:The Tool Presets option on the far left of the Options Bar.
To reset your Toolbar back to its default layout, right-click (Win) / Control-click (Mac) on the Tool Presets icon. Then choose Reset All Tools from the menu: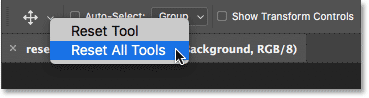
Choosing the "Reset All Tools" command.
Step 3: Click OK
To confirm that you want to reset the tools and the Toolbar, click OK: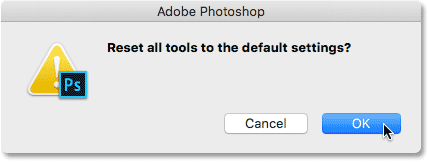
Clicking OK to restore the default tool and Toolbar settings.
And just like that, my Toolbar is back to its original layout, with all of the default tools once again visible. And, if I was to select any of the tools, I would see that all of its options in the Options Bar have been reset to the defaults:
Each spot has been instantly reset to its default tool thanks to the improved Reset All Tools command.
Selecting The Tools
Each icon in the Toolbar represents a different tool we can select. Yet as they say on late night infomercials, "But wait... there's more!". Most of the tools we see in the Toolbar have more tools hiding behind them in the same spot. To view the additional tools, right-click (Win) / Control-click (Mac) on a tool icon. A fly-out menu will appear listing the other tools that are grouped in with it.Photoshop's tools are grouped together with other tools that are similar in what they do. For example, if I right-click (Win) / Control-click (Mac) on the Rectangular Marquee Tool near the top, a fly-out menu appears. The menu shows me that the Elliptical Marquee Tool, the Single Row Marquee Tool and the Single Column Marquee Tool are all grouped together and available in that same spot. This makes sense because all four tools are basic selection tools:
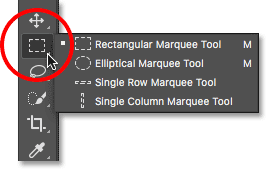
Photoshop's four geometric selection tools are all found in the same spot in the Toolbar.
If I right-click (Win) / Control-click (Mac) on the Spot Healing Brush Tool, we see that it shares that spot in the Toolbar with the Healing Brush Tool, the Patch Tool, the Content-Aware Move Tool, and the Red Eye Tool. These are all photo retouching tools, so again it makes sense that they're grouped together: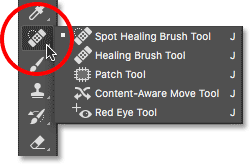
Many of Photoshop's retouching tools are grouped together.
Why Do We Need To Customize The Toolbar?
I won't go through every tool in the Toolbar, but obviously, there's a lot of them (66 by my count as of Photoshop CC 2017). It's great that Photoshop gives us so many tools to work with, but you probably won't need every tool every day. There are some tools that you'll use all the time. Others, you'll use left often. And still others that, well, you'll have no use for at all.Wouldn't it be great if we could customize the Toolbar so we could keep just the tools we need and hide the ones we don't? How about being able to change the order of the tools? That way, the tools you use the most could appear first, rather than being scattered all over the place. And what if we could group and ungroup tools in ways that make more sense to us and the way we work? Finally, what if we could save our customized Toolbar layout as a preset that we could switch to whenever we needed?
In earlier versions of Photoshop, there was no way to do any of those things. But in Photoshop CC, Adobe finally lets us customize the Toolbar any way we like. Let's see how it works.
How To Customize The Photoshop Toolbar
To customize the Toolbar in Photoshop, we use the Customize Toolbar dialog box. To open it, go up to the Edit menu in the Menu Bar along the top of the screen and choose Toolbar: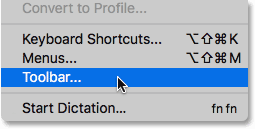
Going to Edit > Toolbar.
Or, right-click (Win) / Control-click (Mac) on the Ellipsis icon (the three little dots) directly below the Zoom Tool in the Toolbar itself. Then, choose Edit Toolbar from the fly-out menu:Right-clicking (Win) / Control-clicking (Mac) on the Ellipsis icon and choosing Edit Toolbar.
The Customize Toolbar Dialog Box
Either way opens the Customize Toolbar dialog box. The dialog box is made up of two main columns. On the left is the Toolbar column. The Toolbar column displays the current Toolbar layout, including the order in which the tools appear and their groupings. On the right is the Extra Tools column. It's where we drag tools from the Toolbar column that we want to remove: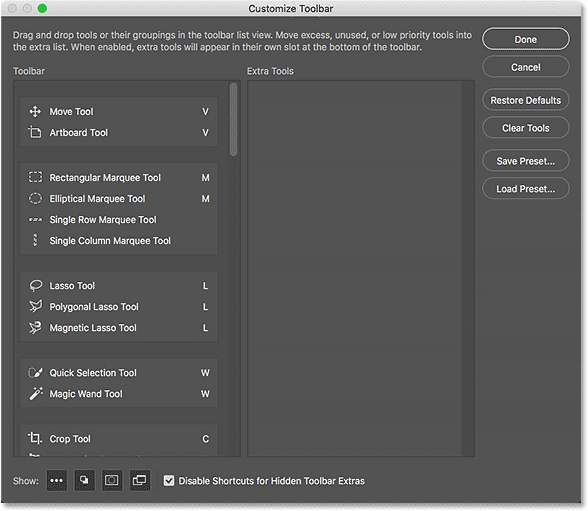
The Customize Toolbar dialog box in Photoshop CC.
How To Remove A Tool From The Toolbar
To remove a tool from the Toolbar, simply click on the tool in the Toolbar column on the left and drag it into the Extra Tools column on the right. But before I show you how it works, I'm going to close out of the Customize Toolbar dialog box for a moment. To do that, I'll click the Cancel button in the upper right. This closes the dialog box without saving any of your changes: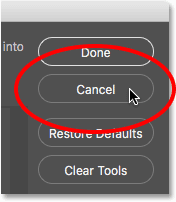
Clicking the Cancel button.
With the dialog box closed, I'll right-click (Win) / Control-click (Mac) on the Move Tool at the very top of the Toolbar. This opens the fly-out menu where we see that, by default, the Artboard Tool is nested behind the Move Tool: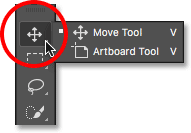
The Move Tool and Artboard Tool share the same spot in the Toolbar.
Let's say I don't really use the Artboard Tool very often, so I'd like to remove it from the Toolbar. To do that, I'll right-click (Win) / Control-click (Mac) on the Ellipsis icon near the bottom of the Toolbar. Then, I'll choose Edit Toolbar from the fly-out menu, just as we saw earlier:Choosing the Edit Toolbar command.
This opens the Customize Toolbar dialog box, again as we saw earlier. If we look at the top of the Toolbar column on the left, we see the Move Tool and the Artboard Tool grouped together: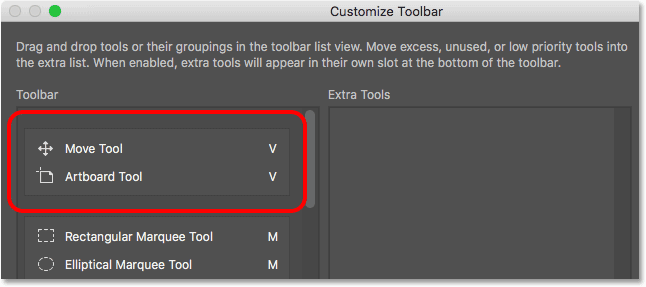
The Customize Toolbar dialog box showing the Move Tool and the Artboard Tool group.
To remove the Artboard Tool from the Toolbar, all I need to do is click on it in the Toolbar column and drag it into the Extra Tools column: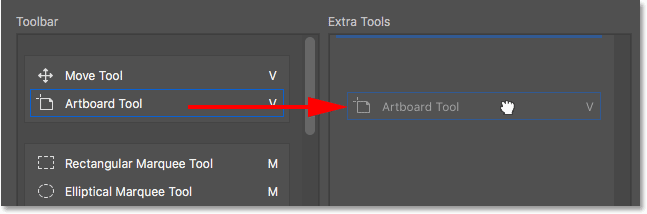
Dragging the Artboard Tool from the left column into the right column.
I'll release my mouse button, and now the Artboard Tool no longer appears in the Toolbar on the left. It's now an extra tool over on the right: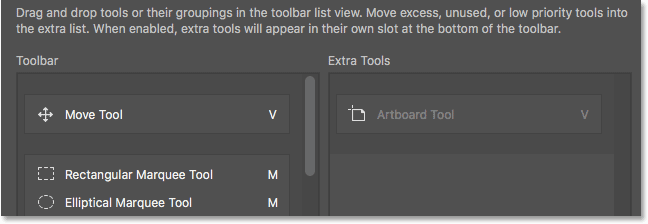
The Artboard Tool is now an extra tool, not a main tool in the Toolbar.
To accept my change and close out of the dialog box, I'll click the Done button in the upper right: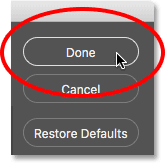
Clicking the Done button.
And now, if I right-click (Win) / Control-click (Mac) on the Move Tool in the Toolbar, nothing happens. The fly-out menu no longer appears. That's because the Move Tool is now the only tool in that spot. I've removed the Artboard Tool that was previously nested behind it: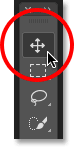
The Move Tool now sits alone at the top of the Toolbar.
Where To Find The Extra Tools
So, where did the Artboard Tool go? Well, when I say I've removed it from the Toolbar, that's not really true. We don't actually remove tools completely. Instead, we simply move them from the main Toolbar layout into a new, hidden Extra Tools area. To view the Extra Tools area, right-click (Win) / Control-click (Mac) on the Ellipsis icon in the Toolbar to open the fly-out menu. Or, click and hold on the Ellipsis icon for a moment and the fly-out menu will appear.Any tools you've dragged into the Extra Tools column of the Customize Toolbar dialog box (like my Artboard Tool, for example) will appear here, listed below the Edit Toolbar command. This means that if and when you do need these tools, they're still here and ready to select. The only difference is, they're now tucked away in a separate area:

Extra tools are listed below the Edit Toolbar command.
How To Restore A Tool In The Toolbar
Now that I've moved the Artboard Tool into the Extra Tools area, what if I realize I made a mistake? I actually do use the Artboard Tool quite a bit, so how do I move it back into the main Toolbar? To restore a tool, click on it in the Extra Tools column on the right and drag it back into the Toolbar column on the left.Creating An Independent Tool
Pay attention, though, to the blue horizontal bar that appears below your little "grabby" hand cursor as you're dragging the tool. This blue bar tells you where you'll be dropping the tool when you release your mouse button. Where you drop it is where it will appear in the Toolbar. For example, if I drag the Artboard Tool below the Move Tool so that the blue horizontal bar appears between the Move Tool and the group that begins with the Rectangular Marquee Tool: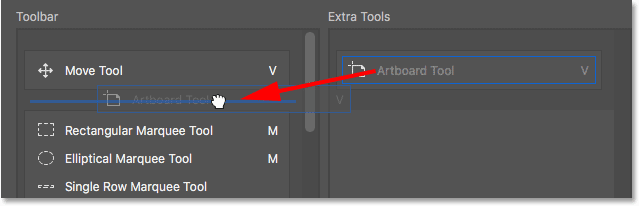
Dragging the Artboard Tool below the Move Tool.
Then when I release my mouse button, Photoshop drops the Artboard Tool into that spot, making it an independent tool rather than being part of any group: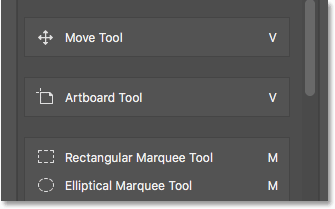
The Artboard Tool now sits below and separate from the Move Tool.
The Live Toolbar Preview
The Toolbar itself actually updates to show us a live preview of the changes we're making in the Customize Toolbar dialog box. Here, we see the Artboard Tool now sitting below the Move Tool: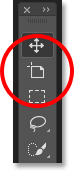
The Toolbar updates as we make changes.
Grouping A Tool With Other Tools
What if, instead of having the Artboard Tool separate, I wanted to group it back in with the Move Tool as it was originally? I'll click and drag the Artboard Tool back into the Extra Tools column for a moment: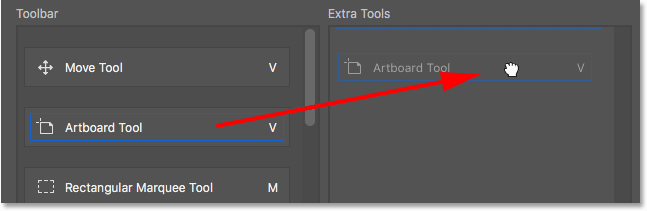
Dragging the Artboard Tool back into the Extra Tools column.
Then, I'll drag it back into the Toolbar column. But this time, rather than dragging it below the Move Tool, I'll position my hand cursor so that the blue horizontal bar appears just inside the bottom of the Move Tool's box: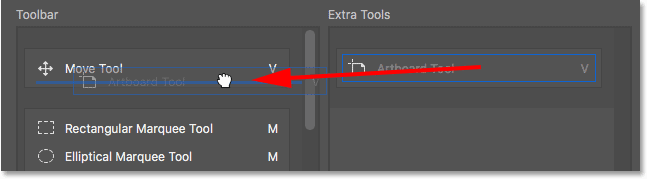
Dragging the Artboard Tool into the same group as the Move Tool.
I'll release my mouse button, and now the Artboard Tool is once again grouped in with the Move Tool: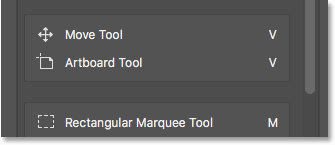
The Move Tool and Artboard Tool once again share the same group.
How To Group And Ungroup Tools In The Toolbar
If you think about it, the Artboard Tool and the Move Tool really have nothing to do with each other. So why are they part of the same group? It makes more sense for them to be separate, independent tools in the Toolbar. How do I ungroup them? I mean, I could drag the Artboard Tool back into the Extra Tools column and then back into the Toolbar column again as I did a moment ago. But there's an easier way.Ungrouping A Single Tool
To ungroup the Artboard Tool, all I need to do is click on it and drag it downward until the blue horizontal bar appears below and separate from the Move Tool's box: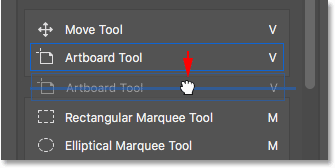
Dragging the Artboard Tool down and away from the Move Tool.
When I release my mouse button, Photoshop ungroups the Artboard Tool from the Move Tool and displays them independently of each other: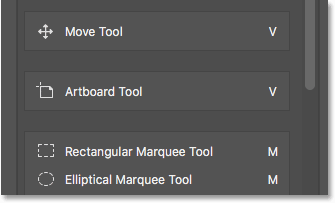
The two tools have been ungrouped.
Comments
Post a Comment